

Q. I am considering adding more TimePilot clocks to my system and was wondering if it can handle employees clocking in at one location and clocking out at another.
A. Absolutely. It doesn't matter which TimePilot clock is used. You can mix and match TimePilot clocks—Vetro, Extreme, Tap, TimePilot PC and even our iPhone App—and employees can clock in or out at any of them without a problem.
When you set up your clocks, you’ll give each a name; we suggest using its location as its name (for example, “South Entrance,” “Front Door,” or “Loading Dock”). When an employee clocks in or out at any clock, the employee’s name, time of clock-in/out and the name of the clock are sent to the TimePilot database. When you view the transactions in TimePilot Central, you’ll be able to see all the clock-ins and clock-outs as well as where they occurred.
Q. Is there any way to set up my iButtons in TimePilot Central right at my PC without entering the serial number manually? Each iButton's number is extremely long and difficult to read.
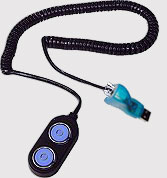
A. Save your eyes! That’s why we include the iButton Receptor (also known as a Blue Dot Receptor) in each Starter Kit. Here’s how to use it:
- Before plugging the iButton Receptor into a USB port on your computer, install the driver software that will allow the device to work properly. You’ll find it on your TimePilot Software CD. Insert the CD into your CD/DVD drive, choose “Install TimePilot Software,” then “TimePilot Installation Menu” (not Installation Wizard). Choose “Blue Dot Receptor” from the list that appears and follow the instructions to install the driver.
- Plug the iButton Receptor into a USB port in your computer. The device will be recognized by Windows.
- Now set up your employees. On the "Add a Profile" screen, when you're asked for the employee's iButton number, click the “Get iButton Number” button. Then simply press the iButton into either one of the blue probes on the iButton Receptor. The device will read the number from the iButton and enter it in the software.
Note: The iButton Receptor is not included with TimePilot PC, but if you want to increase your level of security, you can add the iButton Receptor to require your employees to use iButtons to clock in and clock out. For more on this topic, please click here.
Q. Is there a way to set up employees so they can clock in about 7:15 a.m. but have their start time recorded as 7:30 a.m.? We’d like to do that, but we don’t want them to show up at 7:45 a.m. and have their clock-in rounded to 7:30.
A. This situation is why we have the Snap-To feature. Many employees like to get to work early, settle in and not have to clock in exactly when their shift starts. The feature is extremely flexible: Snap-To can be used on clock-ins or clock-outs, before or after a shift start. The Snap-To setup screen is available when you create or edit a shift in TimePilot Central (Setup menu > Shift Setup… ). When you add or edit a shift, the Snap-To screen is the second tab across the top of the screen. Note: To use Snap-To, you’ll need to set up a shift, because otherwise there’s no start or end time for the software to snap to.
Q. How do I check my iButtons to make sure they're working correctly?
A. iButtons have a very long lifespan and are extremely durable. Though they may resemble a watch battery, they contain no power source to run down. We guarantee they'll last a lifetime. However, like any other product, there is a chance (miniscule in our experience) one could be flawed. Here's how to test your iButtons:
- Tap the iButton to a timeclock station that's receiving power. The station does not need to be connected to a computer, nor does the iButton have to be set up on the system.
- If the timeclock emits a sound or any text appears on the LCD screen, the iButton is working correctly.
For more on iButtons, visit this page on our web site.
Q. I lost my TimePilot USB drive. I tried to use another USB drive, but it’s not working. What should I do?
A. The USB drive you are using has not been configured for our system. To do so, go to Start > All Programs > TimePilot IV > TimePilot Utilities > TimePilot Support Utility. Select “Initialize USB Drive” and follow the instructions that appear. In a few seconds, it will be ready to use. Note: We can't guarantee that every manufacturer's USB drive will work with our products, but most will work without any problems.

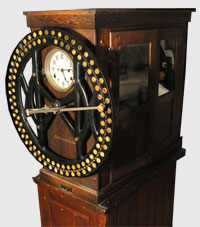
An early Bundy timeclock.
From timeclocks to ...: On Nov. 20, 1888, Williard L. Bundy, a jeweler, invented the first timeclock. A year later, he and his brother founded the Bundy Manufacturing Company in Binghamton, N.Y., and hired fewer than a dozen workers to build the clocks. Over the next 35 years, the company acquired other companies and merged with still others. In 1914 it hired Thomas Watson as its manager, and in 1924 Watson changed the company's name... to International Business Machines (known today as IBM).
Yawn, drama, yawn, drama: Is your teenager a little more cranky than usual? A study by Rensselaer Polytechnic Institute found that later sunsets in spring—and the accompanying longer daylight hours—make it more difficult for teenagers to fall asleep early enough to be well-rested before school starts the following morning. The resulting sleep deprivation can cause mood changes, increased risk of obesity and possible underperformance at school. “As a general rule, teenagers should increase morning daylight exposure year round and decrease evening daylight exposure in the spring to help ensure they will get sufficient sleep before going to school,” said RPI Associate Professor Dr. Mariana Figueiro.
|
||||

Every once in a while, our employees come across “cool stuff.”
This is where they share their finds.
 Google AdWords |
|
|
This isn’t that new, but it’s certainly cool. Google AdWords is an advertising tool that lets the little guy compete with the big guys. You’ve probably seen the ads that appear across the top of the screen and down the right side when you do a search in Google. Those are placed by Google’s AdWords system. It’s called pay-per-click advertising. The benefit over traditional advertising is that you only pay when someone clicks on your ad. We use it and it has been very effective. You write the ad—just a few lines of text with a link to your web site. Then you give Google a list of keywords where you want your ad to appear. For instance, an ice cream stand might want to have its ad appear when |
someone does a search for “ice cream sundae” and for “ice cream cone.” Then you tell Google how much you’ll pay when someone clicks your ad and your maximum monthly budget. Now, you’re probably thinking, “My ice cream stand is in Andover, Mass.—why would I want to advertise all across the world?” Good question: You don’t have to. You can have Google target your ads only to people within a city, a region, a country or even a specific distance from your business. You can cancel at any time, or even turn off your ad for a few days if you want. Google gives you lots of help to get started. Here’s a link: http://www.google.com/adwords/index.html. |
|
TimePilot Corporation
340 McKee St.
Batavia, IL 60510
|
Phone: 630-879-6400
E-mail: Info@TimePilot.com
Web site: https://TimePilot.com
|
| © Copyright 2013, TimePilot Corp. All rights reserved.
|
|