TimePilot Vetro

Introduction to TimePilot Vetro

How does the system work?

Your TimePilot Vetro clock is attached to a wall and powered by a nearby electrical outlet. Employees can clock in and out in two ways: by tapping their iButton to the "In" or "Out" probes at the bottom of the clock; or by entering a four-digit ID code and pressing the "In" or the "Out" button on the clock’s keypad.

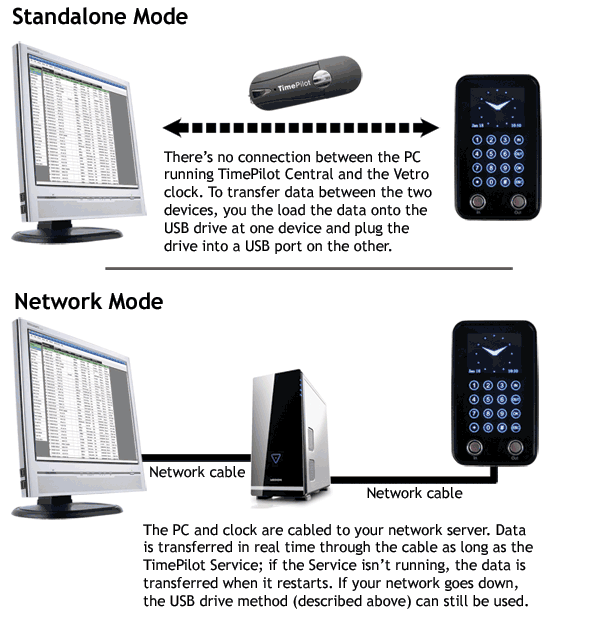
The clocks operate two ways: Standalone Mode or Network Mode.

Vetro's Standalone and Network Modes

Once the clock-in and clock-out data is transferred into the TimePilot software, supervisors can view the data, make changes and corrections, create reports based on the data and prepare the data for their payroll service or software.

The Quick Start Guide gives more details, but here’s an overview of the basic setup process:

  1. Mount your clock according to the directions in the included template. When you plug in the power supply, you'll set the time and date.
  2. Install your software and set up your company. When you run the software CD for the first time, you'll be taken through the TimePilot Central Setup Wizard to set up your software and the TimePilot Vetro Setup Wizard to set up your clock.  
  3. If employees will use iButtons to clock in and out, assign iButtons to each employee. If they’ll use four-digit ID numbers, assign them numbers.
  4. Distribute the iButtons or ID numbers to employees and show them how to clock in and out.