Software Details
Companies

You can have multiple companies in the TimePilot software, each with its own pay period and rounding rules.
What's a Company in the TimePilot system?
A Company is the record of details—your Pay Cycle, when the workweek starts, whether you use Rounding, etc.—about your business. When you set up your employees, each will be assigned to a company.
If you're 1 organization, why would you need more than 1 company?
You don't need more than one if everyone at your organization gets paid on the same schedule. But what if you have two groups of employees, one that gets paid on a bi-weekly basis and one paid monthly? Or if your company uses temp employees? That's when you need another company in TimePilot.
In TimePilot 5, you can have as many companies as you want. When you set up each company, it can have its own:
- Pay Cycle. Choose from weekly, bi-weekly, semi-monthly or monthly.
- First day of the workweek.
- Day and time the pay cycle starts.
- Rounding policies.
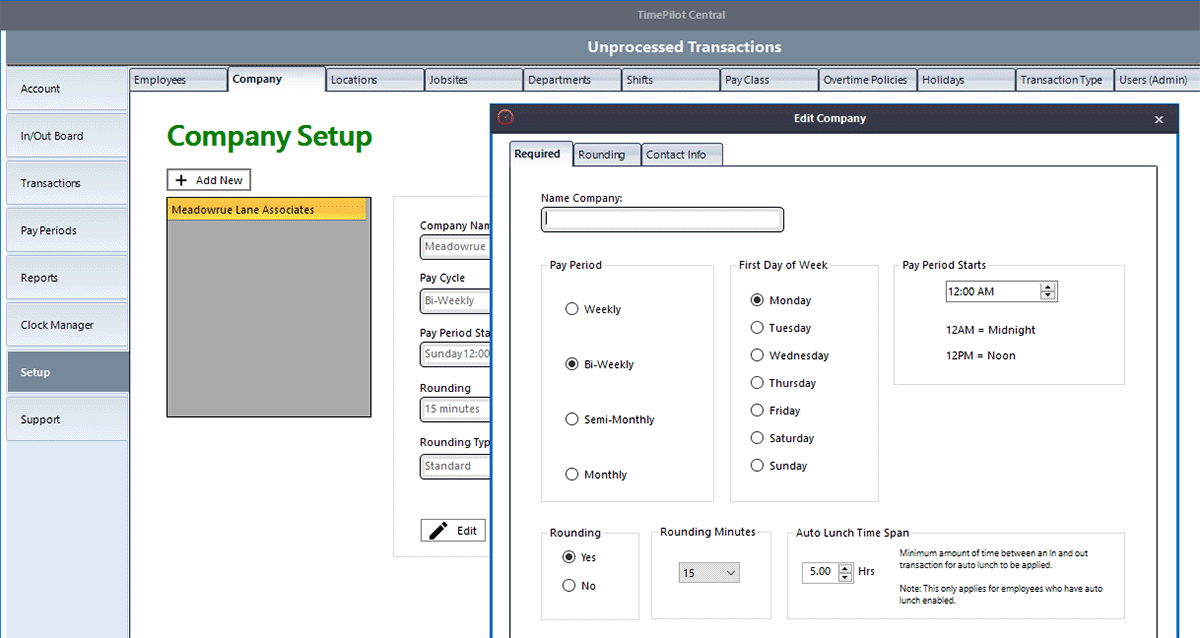
You'll create your first Company in the Setup Assistant, which appears the first time you start your TimePilot software. Later, you can edit your Company details or add or delete a Company by clicking on the Setup tab > Company Tab.
Either way, here's how to create a Company:
- To create a new Company, click on the "Add New" button. If you want to edit or delete a company, click on the appropriate company in the list and click the "Edit " or "Delete."
- If you're adding or editing a Company, the screen at the top of this page will appear.
- First, enter your Company's name in the field at the top of the box.
- Next, choose your Pay Period, which is when your employees get paid.
- Weekly means every seven days (52 pay periods a year).
- Biweekly means every two weeks (26 pay periods a year).
- Semimonthly means twice a month, usually on the 1st and 15th days of the month (24 pay periods a year).
- Monthly means once a month (12 pay periods a year).
- Depending upon your pay period choice, the following items may appear:
- First Day of Week: If you chose a weekly or biweekly pay period, click on the day of the week your pay cycle starts. If you chose semi-monthly or monthly and you pay overtime based on a week's work, you'll need to select the day that starts that week.
- Time Period Starts: This entry tells the software the time of day your Pay Period begins. Be sure to give this some extra thought! If you set the time to when your earliest employee starts work, if he or she clocks in early it will be recorded in the previous pay period. A much better idea is to choose a time that will safely cover all clock-ins and clock-outs in the period. For example, if your employees work Monday through Friday from 8 a.m. to 5 p.m., we suggest setting the time to 12 a.m. (midnight).
- Day Pay Period Starts: If you chose a semi-monthly or monthly pay period, select the day of the month that the pay period begins.

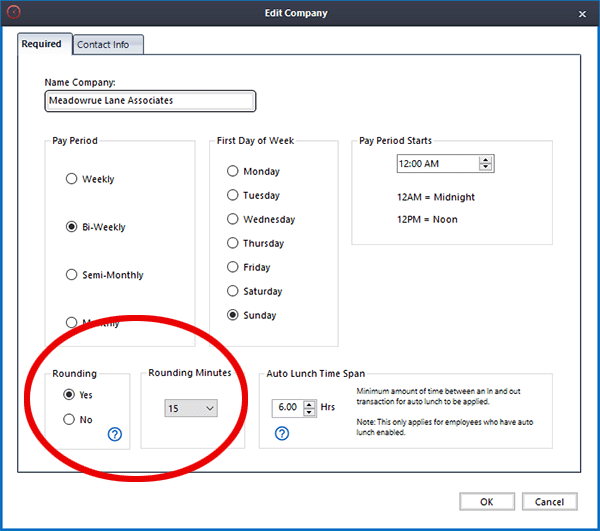
You choose whether to round your employees'transactions when setting up a Company. - Now indicate if you want to round your employees' transaction times by clicking "Yes" or "No" in the Rounding box. It's often desirable to round transaction times to a "round number"; for instance, to avoid having to calculate 1 or 2 minutes of overtime or penalizing an employee who starts work a couple of minutes late because they were in a line of employees at the clock and were not able to tap their iButton at the exact clock-in time. If you choose "Yes," you'll see a box appear that will give you a choice of minutes of rounding.
- No Rounding: Employees' clock-in and clock-out times are not adjusted.
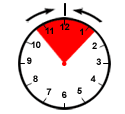
 Rounding: Employees' clock-in and clock-out times are adjusted to the nearest time specified. In the example at right, rounding is set at 15 minutes. If the employee's shift starts at the top of the hour and he or she clocks in at any time within the red zone (7 minutes before or 7 minutes after the top of the hour), the clock-in time will be rounded to the top of the hour.
 Don't see the "Time w/R" column? Click the View Options icon (shown at right) at the top of the Transaction List, choose "Show/Hide Columns...," make sure there's a checkmark next to "Time w/R" and click "Save."

- Finally, click the Contact Info tab. Information entered here is entirely optional.
- When you're done, click "Save."
- Click "Close" to close the Company Setup box.