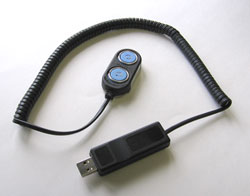
 You can set up iButtons right at your PC with an iButton Receptor. Here’s how:
- Make sure the iButton Receptor is plugged into your PC and its drivers are installed. The drivers are on the TimePilot software CD, or they can be downloaded from the TimePilot web site.
- CD: Place the CD in your CD drive, click "Install TimePilot Software," then "TimePilot Installation Menu," then "Blue Dot Receptor." Choose the version to install, depending upon whether you're using a 64-bit or 32-bit version of Windows. Not sure? Click here to find out.
- Download: You'll need to choose the version to install, depending upon whether you're using a 64-bit or 32-bit version of Windows. Not sure? Click here to find out.
- Start the TimePilot IV software and add or edit an employee profile in TimePilot Central (Setup > Profile Setup).
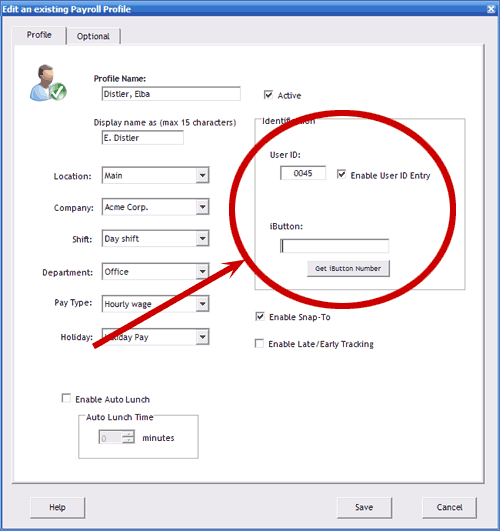
 On the right side of the Employee Profile screen, you’ll see a button labeled “Get iButton Number.” (See screenshot at right.) Click the button.
- Tap the employee’s iButton to either of the probes on the iButton Receptor. The Receptor will read the serial number and display it.
- Choose the color of the keyfob.
- Click OK to return to the Profile screen.
- You have two choices. You can:
- Allow this employee to clock in with an ID number OR an iButton. To do this, make sure there’s a check in the “Enable User ID Number” box in the employee’s profile.
- Require this employee to clock in with an iButton. To do this, clear the checkbox next to “Enable User ID Number” in the employee’s profile.
- If you’re done, click Save.
- Repeat the process to add additional employee iButtons, if
necessary. When you're done adding iButtons, distribute the
iButtons to your employees. They can start using them
immediately.


 You can set up iButtons right at your PC with an iButton Receptor. Here’s how:
 On the right side of the Employee Profile screen, you’ll see a button labeled “Get iButton Number.” (See screenshot at right.) Click the button.