(Reprinted from the TimePilot Help files.)
What are Login Accounts?
There might be a time when you want to give supervisors partial access to the TimePilot database. For instance, you might give a maintenance supervisor access to the transactions created by maintenance department employees, but not to the transactions created by employees in other departments. This is where you set up these permissions.
The employees granted the permission will log on to the system by choosing their User Name from the drop-down list (click the arrow to the right of “Administrator” to see the list) and entering the password they were assigned.
Here’s how to set up a user login:
- Start TimePilot Central (you must have full administrative rights), click the Administrative menu, then “Login Account Setup.”
- Administrator will always appear at the top of the list. This is the master login for your TimePilot system. If you click “Administrator, then the “Edit” button, you will be able to change the master password, but not the name (Administrator).
- To add another user, click the Add Login Account button.
- At the top of the screen that appears, enter the login name (of course, Administrator is already in use, so you’ll need to choose something else) and create a password.
- If you wish, you can enter the name of the person who will be issued this access at the top right of the screen.
- Now decide how much access this person will have:
- Give this user full administrative rights: Full administrative rights means he or she can see and modify everything in your TimePilot system.
- Allow this user to modify the hardware setup: Do you want this user to be able to do things like change the time on your clocks, rename clocks, etc.? If so, click this checkbox.
- Read Only – Do not allow this user to edit transactions or setup information: Do you want to prevent this user from making any changes to your system, but give him or her the ability to see transactions and setup information? If so, click this checkbox.
- Company/Location/Department/Shift: This is where you can limit the parts of your organization that the new user can see and work with. As you click one of these four categories, the various companies, locations, departments and shifts you set up when you set up TimePilot will appear. You can give employees access to any or all.
- Click Save.
Here are some examples of how to put it to use (click any screenshot to see a larger version in your browser):
Example 1

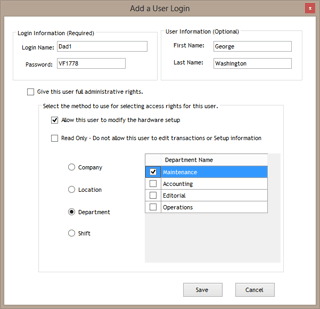
The administrator has set up George Washington, a maintenance supervisor, with his own login (Dad1) and password (VF1778). George will be able to modify the TimePilot hardware, and when he starts TimePilot Central, he will be able to see only those employees who been assigned to the Maintenance Department. In addition, he will be able to modify any of those employees’ transactions (because the “Read Only” box is not checked).
Example 2

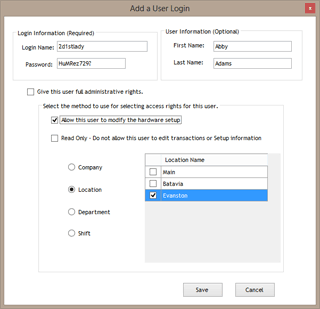
The administrator has set up Abby Adams, a Human Resources supervisor, with her own login (2d1stldy) and password (HuMRez729?). Abby will be able to modify the TimePilot hardware and will be able to see and work with transactions generated by anyone in any department or shift who has been assigned to the Evanston location.
Example 3

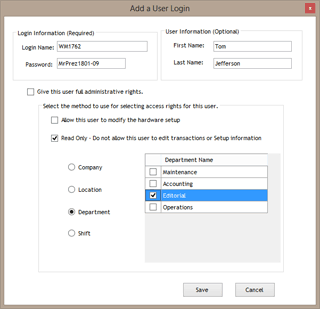
The administrator has set up Tom Jefferson, an employee in Editorial, with a username (WM1762) and password (MrPrez1801-09). Tom cannot modify the TimePilot hardware, and is only allowed to view—not modify—transactions generated by Editorial employees.