
(This article ran in our newsletter several years ago, but with the end of the year approaching, it's still relevant.)
 Setting up holiday schedules in the TimePilot software is
pretty straightforward, but there are some things you can do that will get the job done more quickly and efficiently.
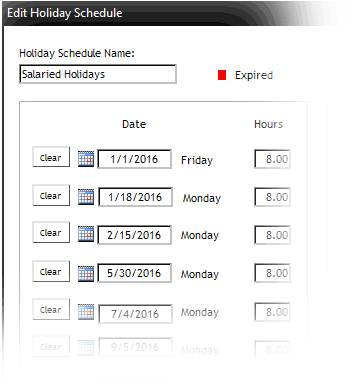
When you installed the TimePilot Central software, you created one or more holiday schedules and then assigned one to each employee.
Now, each time you start TimePilot Central, the software looks at your holiday schedule(s) and determines if a holiday has occurred since the last time the software was started. If a holiday has occurred, the software then runs down the list of employees, looking for those with a holiday schedule that includes that holiday. When it finds one, it inserts into the employee’s record the number of hours you specified when you set up the schedule.
So how can you handle your holiday schedules more efficiently? Here are a few suggestions:
 Want to save even more time? When you're entering your holiday schedule in the TimePilot software, you'll see slots for 20 holidays. Most companies don’t have 20 holidays in a single year. (If your company does, please let us know!) After you fill in your holidays for the upcoming year, keep going and fill the remaining slots with the holidays for the following year, too.

If you have the Professional or Enterprise Edition of the TimePilot software, you can set it to reward an employee with a bonus in dollars. To do this, you'll use the "Insert Pay" function. Here's how:
Start TimePilot Central, then click the "Edit" menu and choose "Insert Pay." (If you want to reward them with extra hours of pay, you can use the "Insert Time" function.) You'll specify the employee and the amount of his or her bonus. You can also specify the time and date of the bonus as well as the location, shift, department and company where the employee was working when they earned the bonus. There's a place to add a note, too.
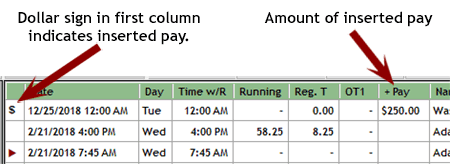
A transaction will be created for the employee in Current Transactions. A dollar sign will appear in the first column of the Transaction List to signal that a transaction is a bonus. To see the amount of the bonus, make sure you have a heading called "+Pay." To do so, right-click the green row of headers in the Transaction List and check the box next to "+Pay" in the list that appears.