

For instructions on how to use the app after it is set up, click here.
Thanks for downloading TimePilot’s Extreme Blue iPhone app or Android smartphone app.
These instructions are for users of the TimePilot Extreme Blue time clock system. If you have the Extreme Blue Enhanced system (with PC software), your instructions are here.
Many of the items covered here are also covered (in some cases in greater detail) in the Quick Start Guide.
It's easiest to set up the app on your smartphone when you're at your PC, although setup can also done done in the field. If you have any questions or suggestions, please contact us at Support@TimePilot.com.
![]() To get started, tap the TimePilot Extreme Blue icon (shown at right). The first time you start the app, the Quick Setup function will run, guiding you through the steps to get up and running. If, at a later time, you want to make a change in any of these categories, just tap the "Settings" icon (the three horizontal lines:
To get started, tap the TimePilot Extreme Blue icon (shown at right). The first time you start the app, the Quick Setup function will run, guiding you through the steps to get up and running. If, at a later time, you want to make a change in any of these categories, just tap the "Settings" icon (the three horizontal lines:  ) which appears after you've finished the Quick Setup.
First, you'll see the "General" screen. Enter a name for your phone and its phone number. Don't tap the "Extreme Blue Enhanced" button—that's for a time clock system that adds cloud storage and PC software. These instructions are for Extreme Blue; if you need the instructions for Extreme Blue Enhanced, click here.
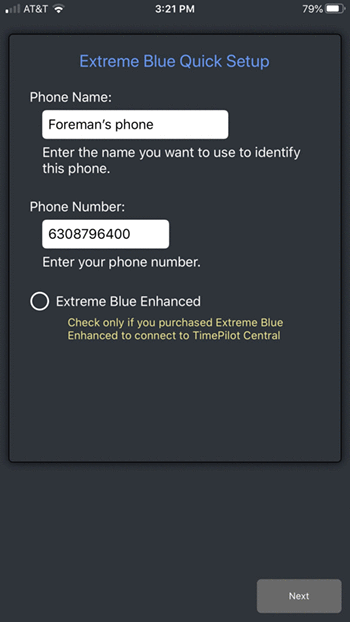
Tips:
Tap “Next” to move to the next screen.
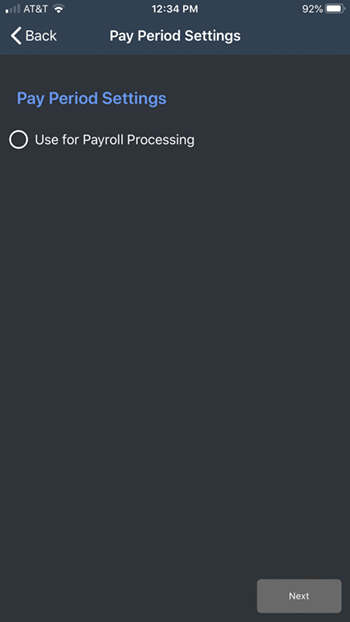
If you just want to use the app as a timer and won’t be using the OT or rounding functions, make sure the “Use for Payroll Processing” button isn’t selected. (The “Week Begins” and "Pay Period Type" items won’t appear.)
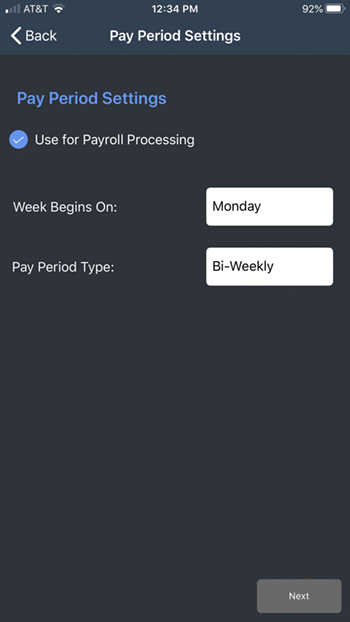
If you’ll be using the app to calculate overtime, tap the “Use for Payroll Processing" button. The “Week Begins” and "Pay Period Type" items will appear. Choose the first day of your workweek and your pay period. To change the day or pay type, simply tap the white box and choose another day or type from the choices that appear.
Tap “Next” to move to the next screen.
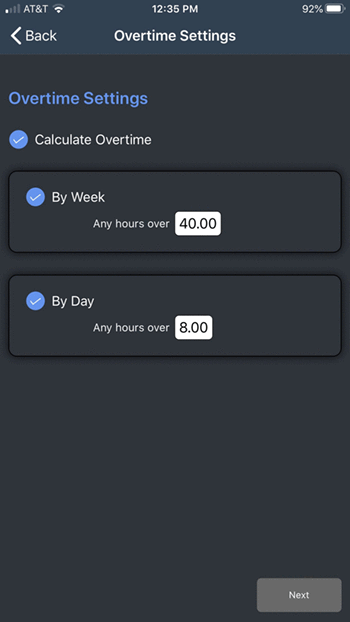
If you’ll be calculating overtime hours, tap the “Calculate Overtime” button. The “By Week” and “By Day” fields will appear. To change the number of hours, simply tap the white box and enter another number.
Tap “Next” to move to the next screen.
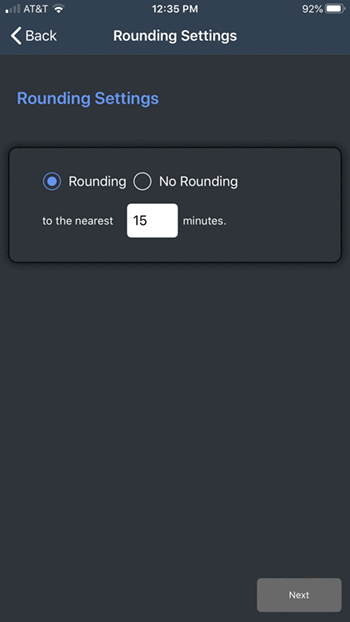
If you want to round your employees’ clock-ins and clock-outs, tap the “Rounding” button. The default rounding amount is 15 minutes; if you want to change that number, simply tap on the white box. You'll be able to choose 1, 5, 6, 10 or 15 minutes.
Tip: An example: If rounding is set to 15 minutes, anyone clocking in from 7:53 to 8:07 will be considered to have clocked in at 8 o’clock and anyone clocking from 8:08 to 8:23 will be considered to have clocked in at 8:15.
Tap “Next” to move to the next screen.
The last part of the setup process is setting up your employees. You’ll need to be at the clock to perform this function.
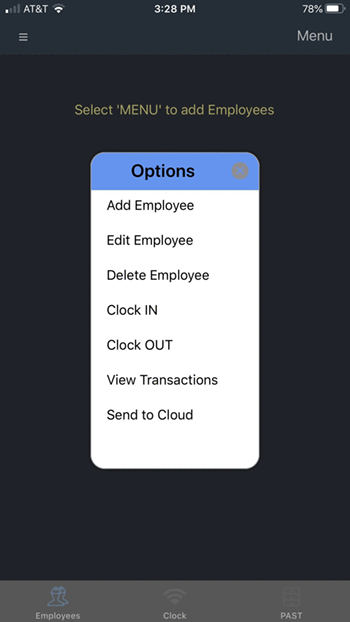
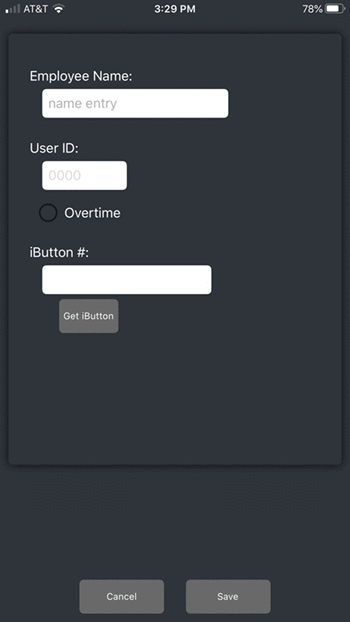
Your system is set up and ready to go. To learn how to use the app, click here.